

Learn How to make methi paratha|stuffed methi paratha- whole wheat paratha stuffed with fenugreek leaves or methi leaves, this paratha is super healthy and super delicious.
*Fenugreek whole wheat flatbread loaded with nutrients and flavours. A very healthy option for breakfast and lunch with minimal ingredients*
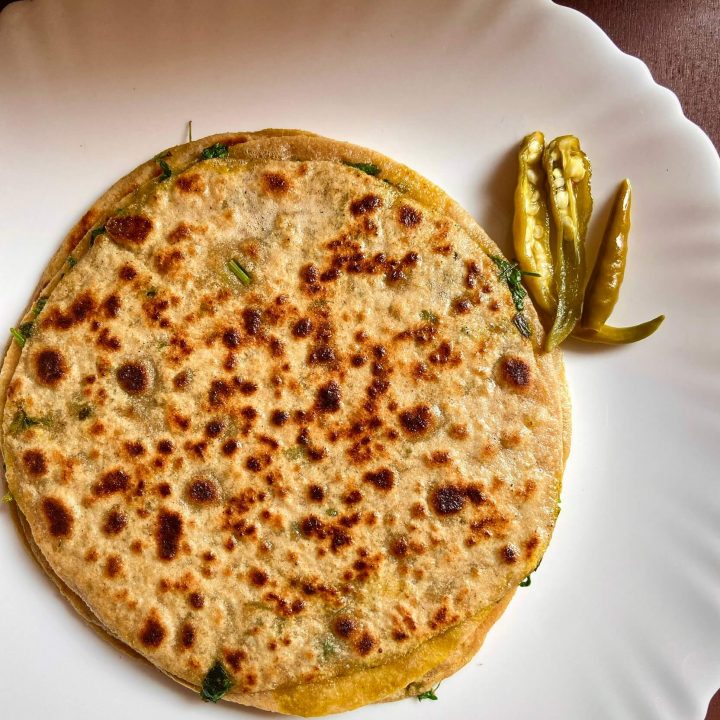
Serve it with yogurt, pickle, hot tea, potato curry or any dry sabzi.
This stuffed methi paratha is:
- Vegan
- Quick and easy
- Requires basic ingredients
- Healthy
- Perfect for breakfast and kids lunchboxes
Quick jumps:
- About the recipe(methi paratha)
- Top tips
- Step by step instructions with pictures
- Other recipes you might like
- Recipe card
About the recipe(methi paratha)
Methi or fenugreek leaves are very popular during winter just like carrots and peas. It has various health benefits too.Fresh methi is available during winters and different varieties of food are prepared with it.
Stuffed methi paratha is very easy to make there is nothing complicated in this recipe. Serve it with yogurt(dahi), pickle(achaar), dry sabzi or potato curry.
This wholesome methi paratha is suitable to take along for travelling and school kids lunchboxes. this paratha stays fresh for 8 to 10 hour at normal room temperature.
My brother loves this paratha so much that he could take this for school lunchbox and then eat it again after coming back home. In India, we get fresh methi leaves for 4 to 5 months so he likes to take this paratha for lunch box as long as fresh methi is available.
This is the perfect way to include methi in your children’s diet, chop the methi leaves very finely so that it won’t come in your mouth.
I hope you will give it a try.🤗
Top tips
- If you are using fresh methi first clean it then wash and lastly chop it.
- Chop the methi leaves finely for stuffing.
- Always make sure to cook paratha at medium to high flame, the tawa or griddle should always be hot while cooking if it is not hot then paratha will become hard just like papad.
- If you have roti aata or roti dough already available then don’t knead the dough because that will work fine.
- If you don’t prefer ghee for cooking parathas then you can use canola oil or refined oil.
- Don’t leave the paratha after stuffing because the methi leaves have salt in it and it will release water so roll the another paratha while the first one is cooking on tawa.
- If you have leftover dough or chopped methi leaves then store it in refrigerator and use it next day.
Step by step instructions with pictures
To prepare dough:
1. In a bowl add wheat flour then gradually add the water in it and knead the dough. The should neither be soft not rock hard.
2. Cover the dough and let it rest for at least 30 to 35 minutes.

To prepare methi stuffing:
3. Clean the methi, take out leaves and thin stalk from the methi and discard the roots and thick stalk. Wash the leaves to remove dirt and drain excess water
4. Finely chop the leaves and In the chopped methi leaves or fenugreek leaves add chopped green chilli, salt, red chilli and turmeric powder. Mix it nicely and methi stuffing is ready.

5. Divide the dough into 6 equal small balls, one paratha will need 2 dough balls for stuffing.
6. Roll the dough and sprinkle some wheat flour in between to prevent it from sticking to the rolling pin or rolling board.
7. Roll both the dough ball into 5 inches roti, spread the methi mixture on one roti and put in the ghee on the centre of the stuffing and place another roti on the top of methi stuffing. Press it down gently with fingers.
8. Sprinkle some flour on it and roll it evenly from all the sides, Meanwhile heat the tawa or griddle. When the tawa is hot dust off the excess flour from the roti and transfer it to hot tawa.
9. After few seconds you will notice that bubbles will be formed on the paratha surface and steam will appear from the sides that’s the time flip the paratha.

10. Again flip the paratha and you will notice brown spots drizzle some ghee or oil on surface and again flip by pressing it gently.
11. Again flip the paratha apply ghee and press it gently. Flip the paratha 2 3 times until both the sides are cooked and it has bright golden brown spots on it.
12. Repeat the same for rest of the paratha and serve it hot.
Checkout Punjabi style stuffed methi paratha at YouTube.
Other recipes you might like
Dry aloo sabzi without onion and garlic
Connect with us on Instagram, YouTube & Pinterest.
Recipe card
How to make methi paratha|stuffed methi paratha
Fenugreek whole wheat flatbread loaded with nutrients and flavours. A very healthy option for breakfast and lunch with minimal ingredients
Ingredients
- 1 cup finely chopped methi leaves
- 1 green chilli finely chopped
- 1/2 teaspoon salt
- 1/4 teaspoon red chilli powder
- A pinch of turmeric powder
- 2 cup wheat flour
- Water to knead dough
- 1 1/2 teaspoon ghee
- Oil or ghee for roasting paratha
Instructions
To prepare dough
- Add 2 cup wheat flour in a bowl and gradually mix water in it and knead the dough.
- The dough should neither be soft or too much hard, let the dough rest for 30 minutes.
Methi leaves stuffing & rolling paratha
- Clean the methi leaves by removing thick stalk and roots from it, then wash the cleaned methi leaves and then chop it finely.
- In 1 cup finely chopped methi leaves add 1 finely chopped green chilli, 1/2 teaspoon salt, 1/4 teaspoon red chilli powder and a pinch of turmeric. Mix it nicely and stuffing is ready.
- Make around 6 to 8 small to medium dough balls and sprinkle some flour on it and roll both the dough ball to 5-inch circle.
- On one rolled roti or paratha spread 2 tablespoon methi stuffing or as much as you prefer less or more then put in 1/2 teaspoon ghee in the centre of the stuffing and cover it with another rolled roti and press it gently with finger.
- Transfer the paratha on hot tawa or griddle after few seconds you will notice bubbles of paratha surface flip it and let it cook for few seconds.
- Again flip it apply ghee or oil on paratha surface and press it gently.
- Again flip and apply oil of ghee to another side of paratha and press it gently.
- Flip the paratha 2 3 times until both the sides are cooked and it has bright golden brown spots on it.
- Ready to serve.
Notes
- Always make sure to cook paratha at medium to high flame, the tawa or griddle should always be hot while cooking if it is not hot then paratha will become hard just like papad.
- If you have roti aata or roti dough already available then don’t knead the dough because that will work fine.
- If you don't prefer ghee for cooking parathas then you can use canola oil or refined oil.
- Don't leave the paratha after stuffing because the methi leaves have salt in it and it will release water so roll the another paratha while the first one is cooking on tawa.
Nutrition Information:
Yield:
3Serving Size:
1Amount Per Serving: Calories: 101Total Fat: 4gSaturated Fat: 17gTrans Fat: 0gUnsaturated Fat: 23gCholesterol: 5mgSodium: 1mgCarbohydrates: 12gFiber: 7gSugar: 3gProtein: 33g
All information presented and written within shellyfoodspot.com are intended for informational purposes only.
If you have prepared stuffed methi paratha or any other recipe on shellyfoodspot then please take a minute to rate the recipe and leave a comment and also share a snap how it turned out.
Follow us on Pinterest and subscribe to our mail list to get delicious recipe directly to your inbox.